THE FIELD GUIDE
Dawnwalker Armor Penalties and Second Skin
Use Second Skin I for medium armour and Second Skin II for heavy armour. Each reaches 100% penalty reduction at rank 3. Inventory weight is separate: these perks do not remove overencumbrance.
Which Second Skin skill matches your equipment?
Check each piece’s armour type before spending points. The I and II in the skill names distinguish medium from heavy armour; each named skill then has its own three ranks.
Second Skin I — Medium armour
Follows Vigour. The third rank requires Second Skin I Manual access.
See ranks and trainingSecond Skin II — Heavy armour
Follows Second Skin I. All three ranks require Second Skin II Manual access.
See ranks and training
Mixed equipment can need both skills
Both skills are Swordmastery perks and work in either form. If you mix medium and heavy pieces, check the appropriate skill for each type. Learning the medium-armour skill does not also grant the heavy-armour effect.
The percentage reduces the listed armour-type penalty. It does not add that percentage to an item’s armour rating or remove the weight of the piece.
Penalty reductions, point costs and manual requirements
The costs below are for buying each rank in either skill. They use the existing PC skill catalogue from build 25129649; the later build 25232147 review records the same Second Skin effects and learning costs.
| Rank | Total penalty reduction | Learning cost | I: medium manual | II: heavy manual |
|---|---|---|---|---|
| 1 | 33% | 1 skill point + 1 time segment | Not required | Required |
| 2 | 66% | 1 skill point + 1 time segment | Not required | Required |
| 3 | 100% | 2 skill points + 1 time segment | Required | Required |
Allow four skill points and three segments per full skill
Buying all three ranks of one Second Skin skill costs four skill points and three time segments, plus any prerequisite ranks you still need. The reductions are total effects at each rank: rank 2 means 66%, rather than adding 66% to the previous 33%.
Manual access opens the relevant rank for learning; it does not pay the point or time cost. Check the complete requirement list at a shrine, including the prerequisite skill, before planning the purchase.
Where to look for Second Skin manuals
For Second Skin I, check the Maragir armourer during the day or the daytime armourer upstairs in the house at the centre of Svartrau’s marketplace. Drogos and Ocha are additional possible sellers.
For Second Skin II, check the southwest Svartrau armourer, the daytime upstairs marketplace armourer or the Tantari armourer by day. Ocha is another option after her quest. A chest on the first floor above the Silts Tower basement is an additional manual source.
Check current stock and quest access before committing to a shopping trip. The skill-book directory keeps the corresponding manual requirements and teacher notes together.
 Second Skin I Manual
 Second Skin II Manual
Why full Second Skin does not fix overencumbrance
Inventory weight includes spare equipment and other carried items as well as what is equipped. Exceeding the Inventory Weight Limit prevents fast travel and normally prevents running. Second Skin changes armour penalties without increasing that limit.
- Open the inventory and compare total weight with the current limit.
- At a shrine, move equipment you want to keep into Storage.
- Sell unwanted items, or remove items you no longer need, until you are below the limit.
- Check your weight again before trying to run or fast travel.
Pack Mule changes carry capacity
Pack Mule’s ranks add 30, 60 and 100 maximum Carry Weight respectively. The final rank also allows running while Encumbered. That running exception does not state that fast travel becomes available while overweight.
Choose between storing items and investing in carry capacity based on what you need to keep. Buying another Second Skin rank is useful for the corresponding armour penalty, but it does not solve a weight-limit problem.
Compare equipment after accounting for your skills
For a replacement piece, compare armour type, protection, weight and bonuses for the same slot. Then check the equipped result with your current Second Skin ranks. An item’s base values and Coen’s resulting character stats describe different stages of that comparison.
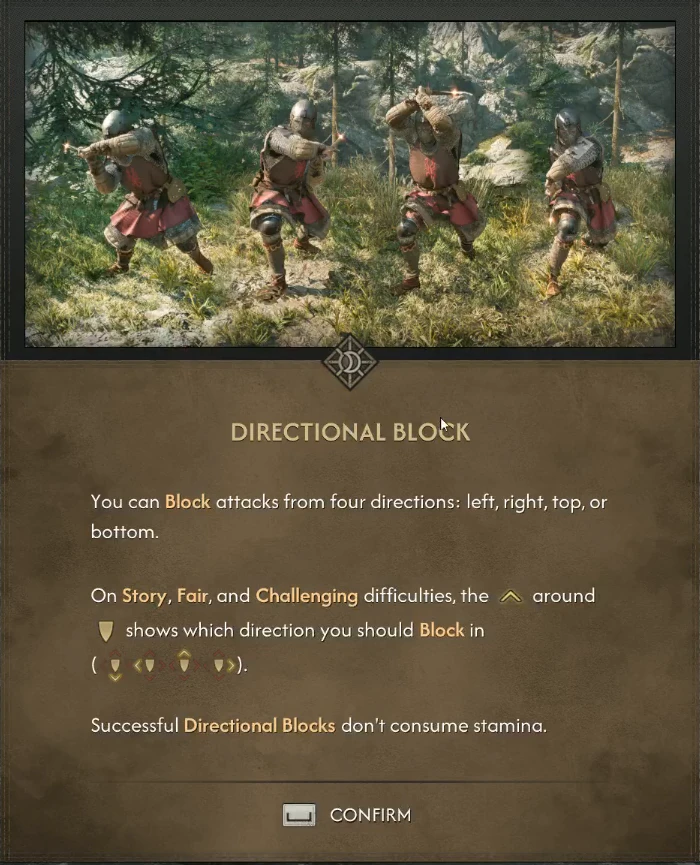
If stamina is the problem, also review the way you defend. Ordinary attacks and Omniblock spend stamina, a successful directional block costs none and a Perfect Block restores some. Those actions remain relevant alongside armour choices.